Passive Reconnaissance
Introduction
Welcome to the Passive Reconnaissance room. This is the starting point of TryHackMe's Network Security Module.
In this room, passive reconnaissance refers to gathering intelligence from public sources without contacting the target. This stands in contrast to active reconnaissance, where you interact with the target directly and risk detection.
Passive recon remains one of the most powerful and lowest-risk phases in penetration testing, bug bounties, and threat hunting. Even with stronger privacy laws (GDPR, CCPA), large amounts of useful data remain publicly exposed through DNS, WHOIS, certificate logs, search engines, and device census platforms.
Objectives
By the end of this room, you will be able to:
- Use
whoisto query domain registration details. - Use
dig(andnslookupfor compatibility) to query DNS records. - Understand why querying public WHOIS and DNS servers is considered passive.
- Discover subdomains using DNSDumpster and Certificate Transparency logs.
- Gather intelligence on exposed services using Shodan.io.
Prerequisites
This room assumes basic networking concepts and comfort with the Linux terminal. If you need a refresher, complete the following first:
Important Notice: If you are not a subscriber, the in-browser AttackBox has no direct Internet access. For any questions requiring web lookups (DNSDumpster, Shodan, crt.sh, etc.), connect via OpenVPN to the TryHackMe network. This gives your local machine (or AttackBox with VPN) full Internet connectivity.
No deployment is needed for this room. All exercises use public Internet data, mostly TryHackMe-related domains for examples.
?Answer the questions below
- This room does not use a target lab machine (VM) to demonstrate the discussed topics. Instead, we will query public WHOIS servers and DNS servers for domains owned by TryHackMe. Start the AttackBox and make sure it is ready. You will use the AttackBox to answer the questions in later tasks, especially tasks 3 and 4.
Passive Versus Active Recon
Before computer networks existed, Sun Tzu wrote in The Art of War: "If you know the enemy and know yourself, your victory will not stand in doubt."
In cybersecurity, this principle maps to two roles. As an attacker (or ethical hacker), you gather intelligence about the target to find weaknesses. As a defender, you must understand what an adversary can discover about your systems from public sources and minimise that exposure.
Reconnaissance (recon) is the preliminary survey to collect information about a target. It remains the first phase in modern attack frameworks like the Unified Kill Chain (where recon helps gain initial understanding before any foothold) and variations of the classic Cyber Kill Chain. Reconnaissance divides into two main types.
Passive Reconnaissance
Passive reconnaissance relies exclusively on publicly available information. No packets are sent to the target and no direct interaction occurs. It is analogous to observing the target territory from a safe distance using binoculars, without ever stepping onto their land.

Common passive activities include:
- Querying public DNS records from open resolvers (A, MX, TXT, etc.).
- Searching certificate transparency logs (e.g., crt.sh) for subdomains and issued certificates.
- Reviewing job postings on LinkedIn or company career pages for tech stack hints.
- Reading public news, press releases, or leaked documents on paste sites.
- Checking exposed devices via search engines like Shodan or Censys.
- Scanning public GitHub repositories for hardcoded credentials or configuration files.
Active Reconnaissance
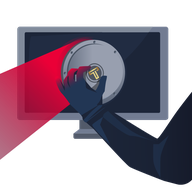
Active reconnaissance requires direct engagement with the target. Your probes can be logged, detected, or blocked. It is analogous to walking up to the doors and windows to test locks, cameras, and alarms.

Common active activities include:
- Sending packets to discover live hosts (e.g., ICMP pings, ARP requests).
- Port scanning or service enumeration (Nmap, masscan).
- Interacting with web applications or APIs (fuzzing endpoints, directory brute-forcing).
- Social engineering attempts (phishing, vishing, pretexting phone calls).
- Physical approaches (tailgating, posing as a vendor).
Because active reconnaissance is detectable (IDS/IPS, WAFs, logging), it carries a higher risk of alerting the target. Without explicit authorisation (e.g., bug bounty scope or pentest contract), it can lead to legal issues. Passive recon is far stealthier and is often the practical first step.
Note that any direct interaction with a person affiliated with the target also counts as active reconnaissance, even when no packets are involved. For example, attending a social event and asking an employee about their company's technology stack is active reconnaissance because you are directly engaging with the target organisation.
Defender tip: Organisations now monitor their own passive footprint using alerts from Shodan/Censys, CT log watchers, and automated OSINT tools to reduce what attackers can find without ever touching the network.
?Answer the questions below
- You visit the Facebook page of the target company, hoping to get some of their employee names. What kind of reconnaissance activity is this? (A for active, P for passive)
- You ping the IP address of the company webserver to check if ICMP traffic is blocked. What kind of reconnaissance activity is this? (A for active, P for passive)
- You happen to meet the IT administrator of the target company at a party. You try to use social engineering to get more information about their systems and network infrastructure. What kind of reconnaissance activity is this? (A for active, P for passive)
Whois
WHOIS is a query/response protocol defined in RFC 3912. WHOIS servers listen on TCP port 43 and provide registration details for domain names. The domain registrar maintains these records for the domains they lease.
From a WHOIS response, the following details may be available (when not redacted):
- Registrar: The company (e.g., Namecheap, GoDaddy) that registered the domain.
- Registrant contact information: Name, organisation, address, phone, and email. However, privacy services (standard since GDPR 2018) usually replace this with "Withheld for Privacy" or similar.
- Dates: Creation (registration), Updated (last change), and Expiration (renewal deadline).
- Name servers: The DNS servers authoritative for the domain.
- Status codes: For example,
clientTransferProhibitedindicates the domain is locked against unauthorised transfers. - Abuse contacts: The registrar's email and phone for reporting issues.
Full personal details are now rare due to privacy laws (GDPR, CCPA) and widespread use of privacy proxies. In practice, attackers focus on dates (for estimating age or timing social engineering around renewal periods), the registrar (for phishing patterns), name servers (potential weak points), and historical changes. Services like whoxy.com provide historical WHOIS snapshots. Historical WHOIS data can reveal previous owners, registrar changes, or name server migrations that may indicate past compromises or infrastructure shifts.
WHOIS Is Being Replaced By RDAP
As of 28 January 2025, ICANN officially sunsetted the traditional WHOIS protocol for generic top-level domains (gTLDs) in favour of the Registration Data Access Protocol (RDAP). RDAP is the modern successor: it uses HTTPS (secure), returns structured JSON (machine-readable and consistent), supports internationalisation, provides better privacy controls (differentiated access), and aligns with current data protection rules. While legacy whois clients still work (often via failover or older servers), RDAP is now the authoritative standard. Many tools and browsers redirect to RDAP automatically, and command-line access is straightforward with curl or dedicated clients like OpenRDAP.
To query WHOIS, use the whois command-line client (faster than most web tools) or online viewers for legacy queries.
Syntax: whois DOMAIN_NAME
On the AttackBox (or Kali/Parrot), run:
           user@TryHackMe$ whois tryhackme.com
[Querying whois.verisign-grs.com]
[Redirected to whois.namecheap.com]
[Querying whois.namecheap.com]
[whois.namecheap.com]
Domain name: tryhackme.com
Registry Domain ID: 2282723194_DOMAIN_COM-VRSN
Registrar WHOIS Server: whois.namecheap.com
Registrar URL: http://www.namecheap.com
Updated Date: 2021-05-01T19:43:23.31Z
Creation Date: 2018-07-05T19:46:15.00Z
Registrar Registration Expiration Date: 2027-07-05T19:46:15.00Z
Registrar: NAMECHEAP INC
Registrar IANA ID: 1068
Registrar Abuse Contact Email: abuse@namecheap.com
Registrar Abuse Contact Phone: +1.6613102107
Reseller: NAMECHEAP INC
Domain Status: clientTransferProhibited https://icann.org/epp#clientTransferProhibited
Registry Registrant ID:
Registrant Name: Withheld for Privacy Purposes
Registrant Organization: Privacy service provided by Withheld for Privacy ehf
[...]
URL of the ICANN WHOIS Data Problem Reporting System: http://wdprs.internic.net/
>>> Last update of WHOIS database: 2021-08-25T14:58:29.57Z <<<
For more information on Whois status codes, please visit https://icann.org/epp
RDAP example
Use curl to query a public RDAP endpoint (e.g., Verisign for .com domains). The jq utility formats the JSON output for readability; it is pre-installed on the AttackBox. If you are using your own system, install it via your package manager (e.g., sudo apt install jq).
           user@TryHackMe$ curl -s https://rdap.verisign.com/com/v1/domain/tryhackme.com | jq .
{
  "domain": "tryhackme.com",
  "handle": "2282723194_DOMAIN_COM-VRSN",
  "ldhName": "TRYHACKME.COM",
  "status": ["clientTransferProhibited"],
  "registrar": "NAMECHEAP INC",
  "events": [
    {"eventAction": "registration", "eventDate": "2018-07-05T19:46:15.00Z"},
    {"eventAction": "last update", "eventDate": "2025-05-11T...Z"},
    {"eventAction": "expiration", "eventDate": "2034-07-05T19:46:15.00Z"}
  ],
  "nameservers": [ ... ],
  ...
}
RDAP output is structured (easy to parse and script) and more secure. Expect to see this format increasingly in modern tooling.
What to look for:
- Redirection chain (Verisign to registrar server).
- Dates: useful for estimating company age or identifying renewal phishing windows.
- Name servers: potential new targets (if in scope).
- Status: locked domains (e.g.,
clientTransferProhibited) are harder to hijack.
Online alternatives (if the whois command behaves unexpectedly):
- https://whois.icann.org/ (legacy WHOIS)
- https://lookup.icann.org/ (modern RDAP-focused lookup)
- https://www.whoxy.com/ (historical WHOIS snapshots, free limited use)
On the AttackBox, open a terminal and run whois tryhackme.com (or try the RDAP curl example) to answer the following questions.
?Answer the questions below
- When was TryHackMe.com registered?
- What is the registrar of TryHackMe.com?
- Which company is TryHackMe.com using for name servers?
nslookup and dig
In the previous task, WHOIS gave us the authoritative name servers for the domain. This task moves to querying DNS records, which is still fully passive because the queries go to public or open resolvers, not to the target's servers directly.
These tools translate domain names to IP addresses, find mail servers, reveal TXT records (SPF, DMARC, verification strings), and more.
Why prefer dig over nslookup?
This task introduces two DNS query tools: nslookup and dig. Both query DNS, but dig (historically a backronym for "Domain Information Groper") is the modern, preferred option. It provides cleaner output, displays TTL values by default (showing how long records are cached), and is more reliable for complex queries and scripting. nslookup is covered here for compatibility, since you will encounter it in older documentation and on Windows systems, but dig should be your default tool.
nslookup
nslookup (Name Server Lookup) is the older of the two tools.
Syntax:
nslookup DOMAIN_NAMEperforms a simple lookup using your default resolver.nslookup -type=TYPE DOMAIN_NAME [SERVER]specifies a record type and an optional DNS server.
Common DNS record types:
| Query type | Result |
|---|---|
| A | IPv4 address(es) for the domain |
| AAAA | IPv6 address(es) for the domain |
| CNAME | Canonical Name: an alias that points one domain name to another |
| MX | Mail Servers: the servers responsible for handling email for the domain |
| SOA | Start of Authority: the primary name server, admin email, and zone serial number |
| TXT | Text Records: arbitrary text, commonly used for SPF, DKIM, DMARC, and domain verification |
Example (IPv4 addresses via Cloudflare's resolver):
                        user@TryHackMe$ nslookup -type=A tryhackme.com 1.1.1.1
Server:         1.1.1.1
Address:        1.1.1.1#53

Non-authoritative answer:
Name: tryhackme.com
Address: 172.67.69.208
Name: tryhackme.com
Address: 104.26.11.229
Name: tryhackme.com
Address: 104.26.10.229
These IPs are often anycast (Cloudflare in this case). For penetration testing, each IP may host different services, so check whether they fall within scope.
MX example (mail servers):
                        user@TryHackMe$ nslookup -type=MX tryhackme.com
Server:         127.0.0.53
Address:        127.0.0.53#53

Non-authoritative answer:
tryhackme.com mail exchanger = 1 aspmx.l.google.com.
tryhackme.com mail exchanger = 5 alt1.aspmx.l.google.com.
tryhackme.com mail exchanger = 5 alt2.aspmx.l.google.com.
tryhackme.com mail exchanger = 10 alt3.aspmx.l.google.com.
tryhackme.com mail exchanger = 10 alt4.aspmx.l.google.com.
....
The number before each server indicates priority: lower values mean higher priority. In this case, Google Workspace handles email, which is common for many organisations and typically well-patched.
dig
dig is the modern, preferred DNS query tool.
Syntax: dig [@SERVER] DOMAIN_NAME [TYPE]
Example (MX records via Cloudflare):
                        user@TryHackMe$ dig @1.1.1.1 tryhackme.com MX

; <<>> DiG 9.18.28-0ubuntu0.22.04.1-Ubuntu <<>> @1.1.1.1 tryhackme.com MX
; (1 server found)
;; global options: +cmd
;; Got answer:
;; ->>HEADER<<- opcode: QUERY, status: NOERROR, id: 12345
;; flags: qr rd ra; QUERY: 1, ANSWER: 5, AUTHORITY: 0, ADDITIONAL: 1


;; ANSWER SECTION:
tryhackme.com. 300 IN MX 1 aspmx.l.google.com.
tryhackme.com. 300 IN MX 5 alt1.aspmx.l.google.com.
tryhackme.com. 300 IN MX 5 alt2.aspmx.l.google.com.
tryhackme.com. 300 IN MX 10 alt3.aspmx.l.google.com.
tryhackme.com. 300 IN MX 10 alt4.aspmx.l.google.com.


;; Query time: 28 msec
;; SERVER: 1.1.1.1#53(1.1.1.1) (UDP)
;; WHEN: Mon Jan 26 22:00:00 UTC 2026
;; MSG SIZE rcvd: 152
Privacy tip: Use public resolvers like 1.1.1.1 (which supports DNS over HTTPS and DNS over TLS) to avoid your ISP logging your queries.
Defender note: Monitor for unexpected DNS changes (new MX records, rogue TXT entries). These can be signs of subdomain takeover or configuration errors.
On the AttackBox, open a terminal and use nslookup or dig (recommended) to answer the following questions.
?Answer the questions below
- Check the TXT records of thmlabs.com. What is the flag there?
DNSDumpster
Standard DNS lookups (dig/nslookup) only resolve names you already know. They will not reveal unadvertised subdomains like blog.tryhackme.com, app.tryhackme.com, or dev.internal.company.com.
Subdomains matter because they often expose forgotten or vulnerable services (outdated CMS installations, development panels), shadow IT or misconfigured applications, and additional attack surface such as exposed APIs or admin portals.
In passive recon, these subdomains are discovered using public OSINT sources with no queries sent to the target.
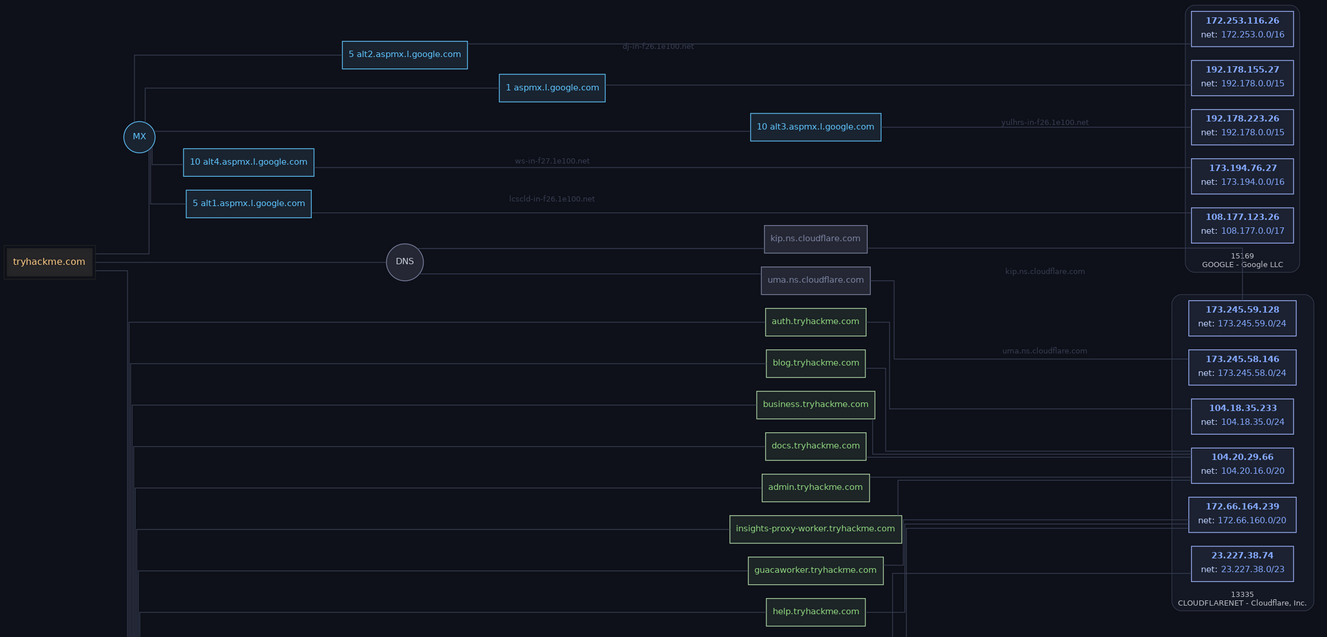
One well-known free tool is DNSDumpster. It aggregates public DNS data from sources such as search engine caches, zone transfer databases, and certificate records. It does not perform brute-force enumeration, which means it remains fully passive. The results include subdomains and hosts, resolved IPs with geolocation, MX, TXT, and CNAME records, and visual maps showing the relationships between these.
Search for tryhackme.com on DNSDumpster and you will see entries like blog.tryhackme.com that basic DNS lookups miss.
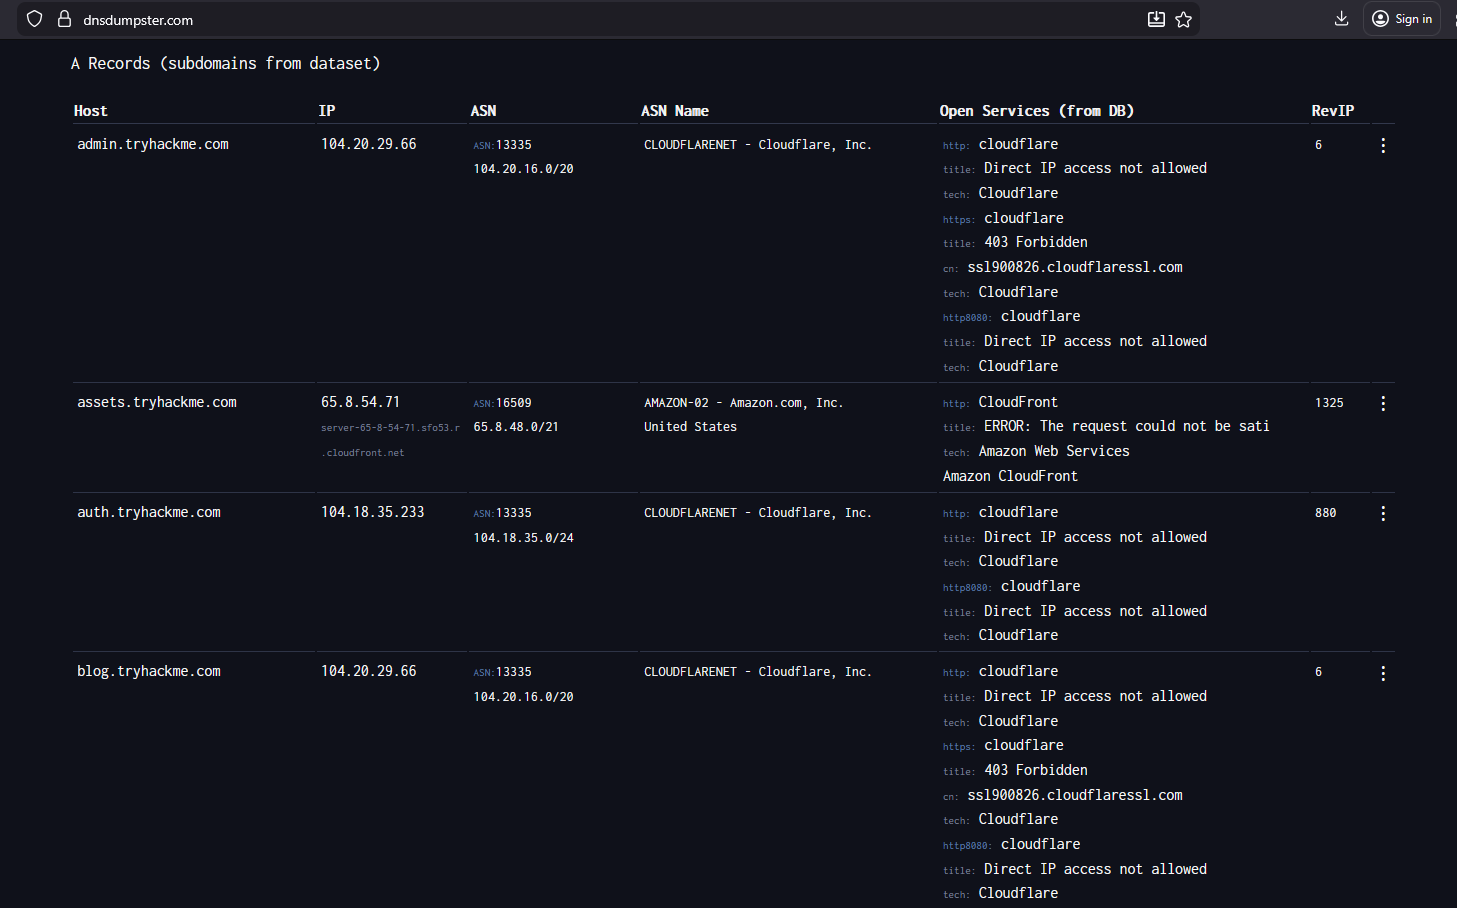
DNSDumpster also graphs the data, showing how subdomains, IPs, and mail servers relate to each other:
Certificate Transparency (CT) Logs
The most effective passive subdomain discovery method today is Certificate Transparency logs, accessible through crt.sh.
Certificate Transparency is a public logging framework (mandatory since approximately 2015) that records every SSL/TLS certificate issued by participating Certificate Authorities. Each certificate contains a Subject Alternative Name (SAN) field listing the domains and subdomains it covers. By searching these logs, you can discover subdomains without sending any traffic to the target.
To use crt.sh, visit https://crt.sh and search for %.tryhackme.com. The % wildcard matches any subdomain. The results will list every certificate issued for subdomains of tryhackme.com, often revealing 10 to 100 times more subdomains than DNSDumpster alone.
crt.sh is fully passive, operates in real time, and has no rate limits for basic use.
Other passive subdomain discovery options include SecurityTrails (free limited searches) and command-line tools like Subfinder, which aggregate multiple passive sources.
Defender perspective: Organisations monitor CT logs and subdomain lists to catch dangling DNS records (which carry subdomain takeover risk) or unauthorised subdomains.
Use the web browser on the AttackBox, or your own system, to answer the following questions.
?Answer the questions below
- Lookup tryhackme.com on DNSDumpster. Under Services / Banners , which one has the highest count?
ISSAF
Overview
Have you ever studied a vintage textbook and found that, despite its age, the core logic still holds up? In cyber security, tools and exploits have a short shelf life, but well-designed methodologies can outlast the technologies they were built to test. The Information Systems Security Assessment Framework (ISSAF) is a case in point.
Developed by the Open Information Systems Security Group (OISSG), ISSAF is an open-source penetration testing framework designed to evaluate network, system, and application security. The latest version, ISSAF v0.2.1, was published around 2006, and the framework is no longer actively maintained. There is no longer an official URL to download it; however, the draft can still be found through archived sources online. This is important context: ISSAF's methodology and phase structure remain instructive, but its tool-specific guidance is outdated and should not be relied upon for current engagements.
So why study a framework that is no longer maintained? Because ISSAF's nine-step assessment model is one of the clearest representations of how an attacker progresses through a target environment. It mirrors the logic of an advanced persistent threat, moving systematically from initial reconnaissance to persistent access and the removal of evidence. If that progression sounds familiar, it should; it is the kill-chain thinking you have encounter in detail in the Cyber Kill Chain room earlier in this module.
ISSAF covers a broad range of security domains, including network infrastructure, host systems, web applications, databases, and social engineering. Its risk-based approach prioritizes high-impact, exploitable vulnerabilities over low-severity findings.
Phases: A Walkthrough
ISSAF divides an assessment into three phases. Let's walk through them with a scenario: your team is assessing the security of TechBridge Solutions, a software development company with 200 employees, an internal Git server, and a client-facing project management portal.
Phase 1: Planning and Preparation
This phase sets the engagement boundaries. You meet with TechBridge's CTO to define the scope (corporate network, Git server, and the project management portal), establish escalation protocols and emergency contacts, identify constraints (the production Git server must not be disrupted during business hours), and agree on the toolset appropriate for the assessment.
Phase 2: Assessment
This is the core of ISSAF and where its nine-step model lives. Each step builds on the previous one, simulating how a real adversary would progress through the environment.
- Information gathering: Collect publicly available data about TechBridge. DNS records, WHOIS data, employee profiles on LinkedIn, and technology references in job postings ("experience with Jenkins and GitLab CI required") all feed your understanding of the target.
- Network mapping: Map the live network topology. You discover TechBridge's external IP range hosts the project portal, a VPN gateway, and a mail server. Internal scanning (once in scope) reveals the Git server, a Jenkins build server, and several developer workstations.
- Vulnerability identification: Scan the mapped assets for weaknesses. The project portal runs an outdated CMS with a known authentication bypass. The Jenkins server has its administrative console exposed without authentication.
- Penetration: Attempt initial exploitation. You exploit the unauthenticated Jenkins console to execute system commands on the build server.
- Gaining access and privilege escalation: Escalate from initial access to higher privileges. From the Jenkins server, you recover stored credentials for the service account that deploys code to production, which has administrative rights on the Git server.
- Enumerating further: With elevated access, enumerate what is now reachable. From the Git server, you discover repositories containing API keys, database connection strings, and client project source code.
- Compromise remote users/sites (lateral movement): Move laterally to other systems. Using the harvested credentials, you access several developer workstations and the internal mail server.
- Maintaining access: Establish persistent access to demonstrate that a real attacker could retain their foothold. You document (without actually deploying) how a backdoor could be planted in the CI/CD pipeline, persisting across system reboots and deployments.
- Covering tracks: Demonstrate how an attacker would erase evidence. You document which logs captured your activity and identify gaps in TechBridge's logging that would allow a real adversary to operate undetected.
Notice the progression: each step deepens the attacker's position in the environment. Steps 1 through 3 are reconnaissance and analysis, steps 4 through 7 are active compromise, and steps 8 through 9 address persistence and stealth.
Phase 3: Reporting and Cleanup
You compile findings into a structured report, prioritized by business impact. The unauthenticated Jenkins console is flagged as critical because it provided the initial foothold that led to source code access. Cleanup involves removing any test artifacts, revoking any temporary accounts created during testing, and confirming with TechBridge's team that no testing residue remains in their environment.
Closing Notes
ISSAF's nine-step model is its lasting contribution. The progression from information gathering through lateral movement to covering tracks provides a clear mental model for how real-world attacks unfold, making it an excellent educational tool even though the framework itself is no longer maintained.
However, that unmaintained status is a real limitation. The tool-specific guidance references software versions that are over a decade out of date, and there is no community updating the documentation. ISSAF should be studied for its methodology and adversarial logic, not for its technical procedures. For current tool guidance, supplement with resources such as PTES, OWASP WSTG, or the relevant tool documentation.
?Answer the questions below
- ISSAF's nine-step assessment model begins with information gathering. What is the ninth and final step?
Shodan.io
During passive reconnaissance, tools like Shodan.io allow you to gather intelligence on a target's internet-facing assets without sending any traffic to them.
Shodan is a search engine for internet-connected devices. It continuously scans the public internet, collects banners and responses from open ports and services, and indexes them for search. Unlike Google, which indexes web pages, Shodan focuses on devices: servers, IoT equipment, cameras, routers, industrial control systems, and more.
Defensive value: Organisations monitor Shodan (via alerts or manual checks) to identify unintended exposures such as rogue servers, forgotten test machines, or vulnerable services.
Navigating the Shodan Interface
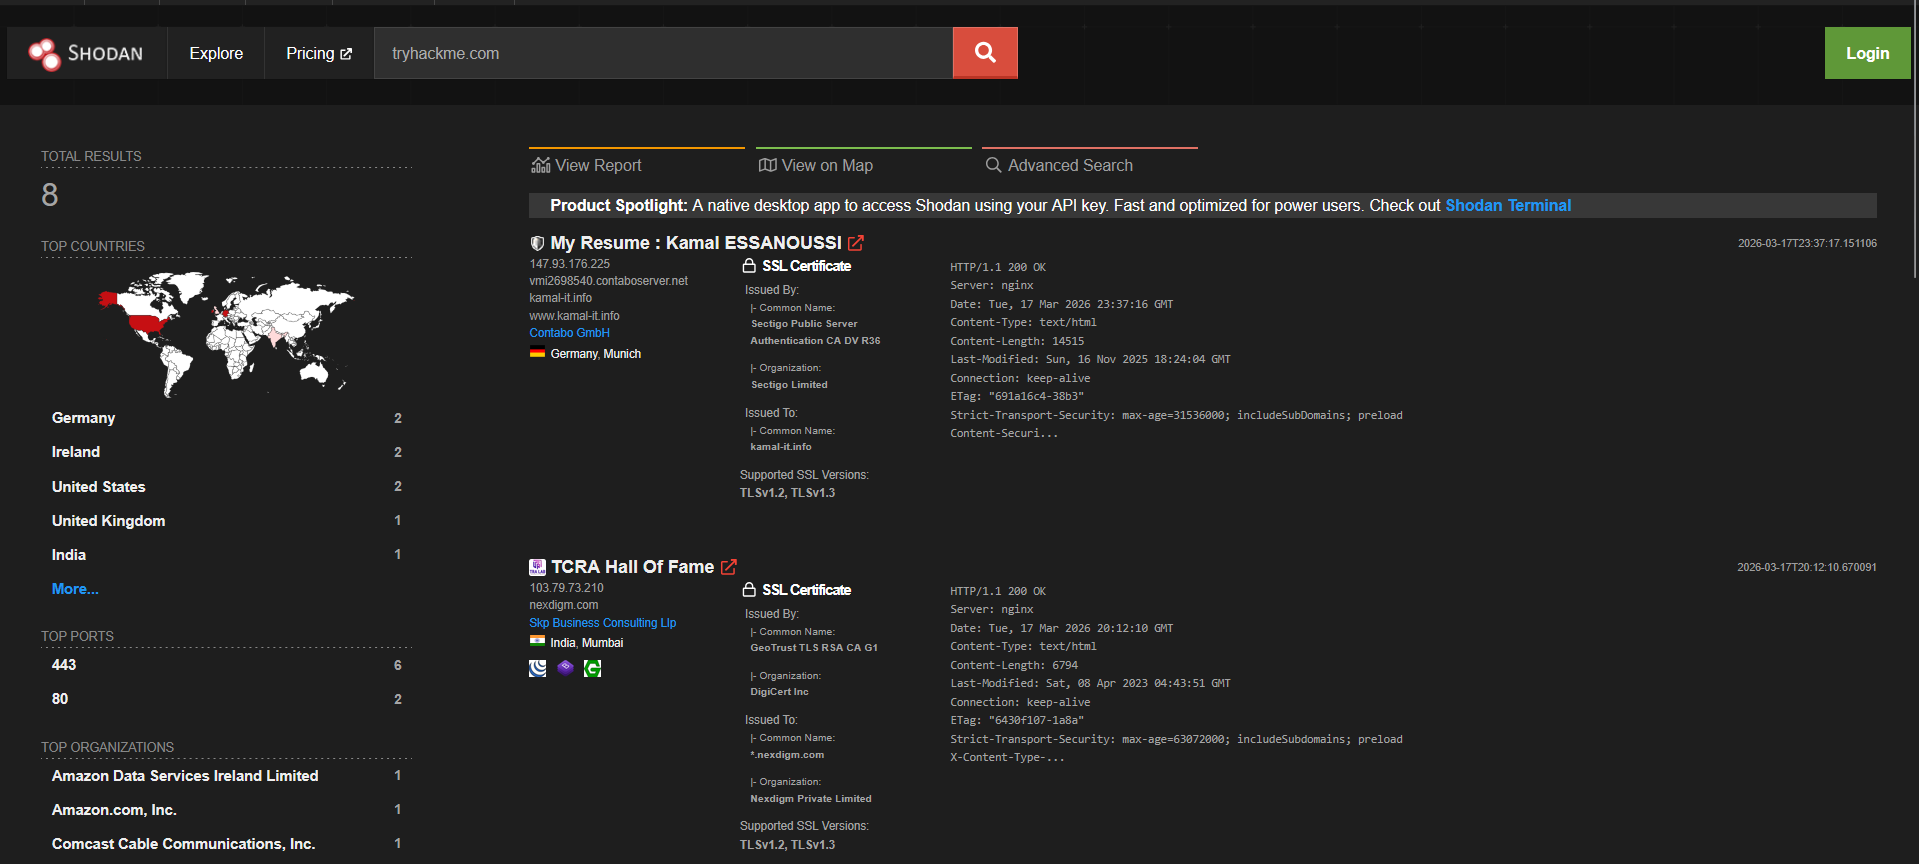
To begin, navigate to https://www.shodan.io. No account is required for basic searches. Enter a domain name (e.g., tryhackme.com) or an IP address from your earlier DNS lookups (e.g., 104.26.10.229) into the search bar.
The results page displays a list of matching hosts. Selecting a host opens a detailed view containing the following information:
- IP address and ASN (Autonomous System Number): identifies the network block.
- Hosting provider/organisation (e.g., Cloudflare, AWS): reveals the infrastructure behind the domain.
- Geographic location (country, city): approximate physical location of the server.
- Open ports and services: with version strings and banners (e.g., HTTP server type and version).
- Tags: such as
cdnorvulnif a known vulnerability matches the detected service version.
Search Tips
Shodan supports a range of search filters for narrowing results:
hostname:tryhackme.commatches a specific hostname.org:"TryHackMe"filters by organisation name.port:443 country:USfilters by port and country.http.component:"wordpress"identifies technology stack (if exposed).
For the full reference, see: https://help.shodan.io/the-basics/search-query-fundamentals
For further exploration, Censys.io (free basic searches) provides similar host and certificate data. It can serve as a useful complement when cross-referencing results.
Exercise
- Go to
https://www.shodan.io(no account needed for basic searches). - Search one of
tryhackme.com's IPs (from Task 4, e.g.,104.26.10.229) or usehostname:tryhackme.com. - Explore the results: note the provider (Cloudflare), location (US), open ports (443/HTTPS is common), and banners.
Use Shodan to answer the questions below. All answers are visible without a premium account.
?Answer the questions below
- According to Shodan.io, what is the first country in the world in terms of the number of publicly accessible Apache servers?
- Based on Shodan.io, what is the 3rd most common port used for Apache?
- Based on Shodan.io, what is the most common port used for nginx?
MITRE ATT&CK
Overview
In the previous tasks, we explored frameworks that tell you how to conduct a penetration test: how to scope it, progress through phases, and report your findings. But consider this situation: you have just completed an engagement using PTES, and the report documents that you gained initial access through a phishing email, escalated privileges by exploiting a misconfigured service, moved laterally using stolen credentials, and exfiltrated data through an encrypted channel. Your client reads the report and asks a deceptively simple question: "How does our exposure compare to what real threat actors are actually doing in the wild?"
That question is difficult to answer with a penetration testing framework alone. Frameworks like PTES and OSSTMM structure your testing process, but they do not systematically catalog the specific tactics and techniques that real-world adversaries use. This is the gap that MITRE ATT&CK fills.
ATT&CK stands for Adversarial Tactics, Techniques, and Common Knowledge. Developed and maintained by MITRE Corporation, it is not a traditional penetration testing framework. It is a knowledge base of adversary behavior, built from real-world observations of how threat actors operate. It catalogs what attackers do, organized in a structure that security professionals can use for threat intelligence, detection engineering, red teaming, and, relevant to this room, enriching penetration test findings.
The Matrix: Tactics, Techniques, and Sub-Techniques
ATT&CK is organized as a matrix. Think of it as a large table. The columns represent tactics, which are the adversary's high-level objectives, the why behind an action. The current Enterprise matrix includes 14 tactics, progressing from initial access through execution, persistence, privilege escalation, defense evasion, credential access, discovery, lateral movement, collection, command and control, exfiltration, and impact.
Within each tactic column, the rows list techniques, which are the how, the specific methods an adversary uses to achieve that tactical objective. For example, under the Initial Access tactic, you will find techniques like Phishing (T1566), Exploit Public-Facing Application (T1190), and Valid Accounts (T1078). Many techniques are further broken down into sub-techniques. Phishing, for instance, has sub-techniques for spearphishing attachments (T1566.001), spearphishing links (T1566.002), and spearphishing via service (T1566.003).
Each technique entry in the ATT&CK knowledge base includes a description, real-world examples of threat groups that have used it, detection recommendations, and mitigations. This is what makes ATT&CK more than a taxonomy; it is a living reference tied to observed adversary behavior.
ATT&CK as a Complement, Not a Replacement
Here is the key distinction for this room: ATT&CK does not tell you how to run a penetration test. It does not define phases, scoping procedures, or reporting formats. Instead, it provides a common language for describing what you found during a test conducted using any framework.
Consider the analogy of a medical dictionary versus a diagnostic procedure. PTES is like the diagnostic procedure: it tells the doctor what steps to follow during an examination. ATT&CK is like the medical dictionary: it provides standardized terminology for naming and categorizing what the doctor observes. You need both, but they serve different purposes.
Walkthrough: Mapping Findings to ATT&CK
Let's see how this works in practice. Recall the MedGuard Health engagement from Task 5 (PTES). Here is how the key findings from that engagement map to ATT&CK technique IDs:
| Engagement Finding | ATT&CK Tactic | ATT&CK Technique |
|---|---|---|
| Phishing email delivered payload to employee workstation | Initial Access | Phishing: Spearphishing Attachment (T1566.001) |
| Exploited Tomcat deserialization flaw on patient portal | Initial Access | Exploit Public-Facing Application (T1190) |
| Extracted cached domain credentials from workstation | Credential Access | OS Credential Dumping (T1003) |
| Moved from workstation to file server using stolen credentials | Lateral Movement | Use Alternate Authentication Material (T1550) |
| Accessed patient records database from compromised portal server | Collection | Data from Information Repositories (T1213) |
By annotating a PTES report with ATT&CK technique IDs, the tester provides MedGuard's security team with actionable insights beyond patching individual vulnerabilities. The client can now look up each technique in the ATT&CK knowledge base, review the detection guidance, and build or validate detection rules for those specific behaviors. The conversation shifts from "fix this one bug" to "can we detect this class of adversary behavior?"
Closing Notes
ATT&CK's strength lies in its role as a universal translator of adversary behavior. It enables penetration testers, threat intelligence analysts, detection engineers, and incident responders to speak the same language. For penetration testers specifically, mapping findings to ATT&CK elevates a report from a list of vulnerabilities to a narrative grounded in real-world threat behavior.
The knowledge base is extensive, and mastering it takes time. The Enterprise matrix alone contains over 200 techniques. For a deeper, hands-on exploration of ATT&CK, including how to navigate the matrix, research specific threat groups, and apply it to detection engineering, dedicated rooms later in the TryHackMe platform cover ATT&CK in far greater detail. For now, the essential takeaway is this: ATT&CK complements your chosen penetration testing framework by providing a standardized vocabulary for what you find.
?Answer the questions below
- In the ATT&CK matrix, what do the columns represent?
- In the ATT&CK matrix, what do the rows within each column represent?
- You compromised a web server by exploiting an unpatched vulnerability in its public-facing application. What ATT&CK technique ID would you use to classify this finding?
Summary
This room covered gathering intelligence without direct interaction with the target: the stealthiest phase of reconnaissance.
Key tools and techniques:
- WHOIS: Domain registration details including registrar, dates, and name servers. Most personal details are now redacted for privacy.
- DNS lookups: A/AAAA (IP addresses), MX (mail servers), TXT (SPF/DMARC/verification), and other record types, queried via public resolvers like
1.1.1.1. - Subdomain enumeration: DNSDumpster for DNS aggregation and graphing, and crt.sh for Certificate Transparency log searches, which is the most effective passive method for discovering subdomains via public SSL/TLS certificates.
- Exposed services: Shodan.io for device banners, ports, and hosting information.
The practical value of these methods is that they are fully passive. They trigger no alerts, carry minimal legal risk (when used ethically and within scope), yet they often uncover forgotten subdomains, outdated services, or misconfigurations.
Command quick-reference:
| Purpose | Command-line Example |
|---|---|
| Lookup WHOIS record | whois tryhackme.com |
| Lookup DNS A records (legacy) | nslookup -type=A tryhackme.com |
| Lookup DNS MX records at specific server (legacy) | nslookup -type=MX tryhackme.com 1.1.1.1 |
| Lookup DNS TXT records (legacy) | nslookup -type=TXT tryhackme.com |
| Lookup DNS A records (recommended) | dig tryhackme.com A |
| Lookup DNS MX records at specific server (recommended) | dig @1.1.1.1 tryhackme.com MX |
| Lookup DNS TXT records (recommended) | dig tryhackme.com TXT |
| Passive subdomain discovery (browser-based) | Visit https://crt.sh and search %.tryhackme.com |
Tips:
- Use DoH/DoT resolvers (e.g.,
1.1.1.1) to keep your own queries private. - As a defender, monitor your footprint: set Shodan/Censys alerts, watch CT logs for new certificates, and track DNS changes for takeover risks.
- Even though passive recon does not touch the target directly, always ensure your overall engagement is authorised and within scope.
- Results change over time. IPs rotate (Cloudflare anycast), subdomains appear and disappear, and privacy redactions increase.
Next steps:
- Dive deeper into DNS: DNS in Detail
- Explore Shodan further: Shodan.io room
- Broaden OSINT: TryHackMe's Search Skills and OSINT rooms, or external resources like the OSINT Framework.
?Answer the questions below
- Make sure you note all the points discussed in this room, especially the syntax for the command-line tools.
 Active Reconnaissance